linki-lista
Sie haben die Auswahl zwischen ⋅ valikoima:
Druckereien ⋅ kirjapainot
Bild ⋅ kuvat
Schrift ⋅ fontit
Text ⋅ textit
Literatur ⋅ kirjallisuus
Impressum
Stickers - Information for bonding
Tips, tricks and information about films & stickers
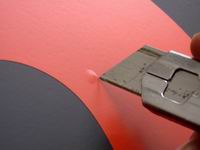
 | plotting - "Carve" the film with the aid of a computer-controlled, vertical standing, sharp knife along the contour lines of letters or arbitrary shapes. Any point of a letter or a Form has an x-y coordinate. The set of all points yields a Vector. |
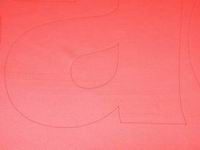 | Visible cut line, in this example the lower part of a small "a" |
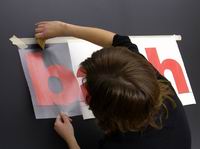
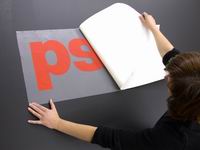
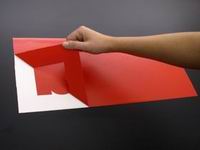 | "Weeding" the removal of the film around the characters, and therebetween, so that in the end only the letters remain. Accurate height, Width and distance between each other created by a computer program like Adobe Illustrator |
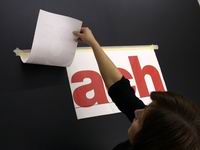
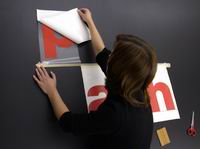
 | Pull the film slowly, "weed" to avoid tearing the letters, especially in the corners |
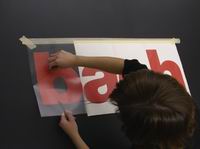
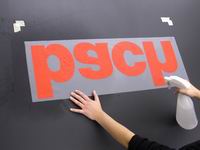
 | Lift out the interiors of the letters with a pointed tool |
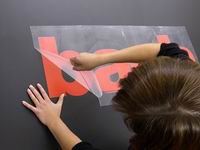
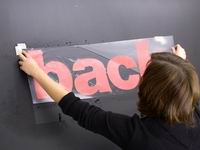
 | Whole lettering weeding is finished |
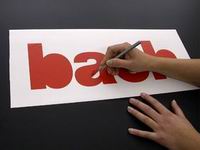
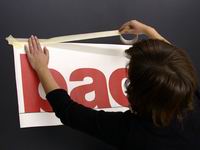
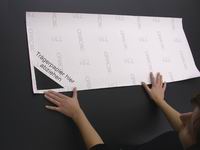
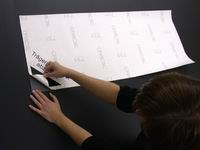
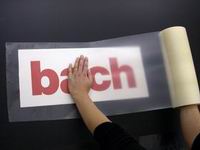 | Cover the lettering evenly and flat with the transfer film, called application tape. Tape that has the following task: The individual letters are not glued but individually defined as a coherent word with the letters exactly in the spacing (kerning) like in the computer. After removal of the carrier paper, in this example white, their position will be retained to the tape. The adhesive force of the application tape is smaller than of the final sticker film, so it can be removed successful after placing the foil letters. |
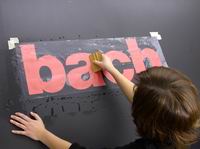
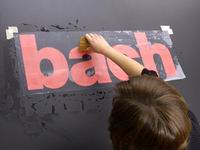
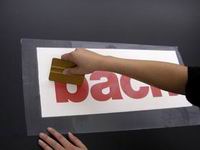 | Press the transfer film with a plastic squeegee or eg. a plastic card in order to achieve the adhesion of the film on the transfer sheet. |
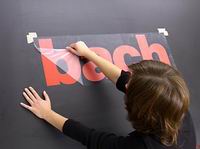
 | Remove the projecting film edges, since these are troublesome in the positioning of the final label |
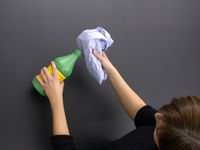 | Clean the substrate of dust and grease, eg with alcohol or paint thinner. Use harsh solvents with caution, as this may cause damage to the paintwork, where appropriate, make a test on a less visible position than in the direct field |
 | |
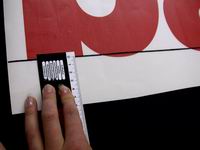 | Accurate measurement of the respective reference edge. It is helpful here sometimes a recorded line below the straight letters. Why ?: At exactly just stick to writing, is measured at the beginning and at the end of a word. Begins or ends with the word several round letters, eg "s", "e", "g", no accurate baseline can be read |
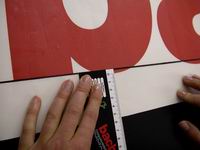 | CAUTION: Do not measure out at the overhangs or descenders of letters, but always take the baseline |
 | Attach the sticker for positioning with tape on both top corners |
 | Transverse mount on top of everything with tape on the ground to fix immovably for further processing |
 | To facilitate the bonding operation, can be cut into larger stickers several times. This reduces the risk that individual parts stick prematurely accidentally in the wrong place, for example, when bonding in wind. |
 | Put the sticker back upwards ... |
 | ... and pull the backing paper slowly |
 | Carefully fold the sticker back down and evenly stroking firmly with a squeegee |
 | Caution: Avoid stress on the outer edges of the tape, as the squeegee e.g. may leave scratches on sensitive paint surfaces |
 | Removing the adhesive tape |
 | Do not remove the transfer tape as illustrated here perpendicular because the final sticker will achieve the desired adhesive strength only after some time, in cold weather it will take some days. |
 | Remove the transfer film always flat to the bonding surface |
 | Mark the exact position with adhesive tape at the corners |
 | turn the sticker |
 | peel off the backing paper, flat and uniform |
 | |
 | After removal of the backing paper spray evenly the surface with a water-detergent mixture (1 spray bottle of water: 3-4 drops of detergent) |
 | Positioning of the label at the marked point. Due to the water-detergent an exact insertion of the film is possible |
 | Emphasize the water with uniform smoothing from left to right |
 | squeeze out the remaining water from the center up and down in a herringbone pattern to ensure a perfect fit |
 | after a few minutes drying time pull off the transfer sheet evenly and flat, possibly to dry it before with a hair dryer |
 | Ready |
 | Beware of blistering: push out the air or water by piercing with a cutter or needle |
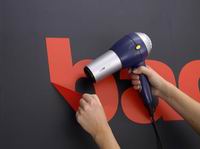
 | Heating the film with a hair dryer, Attention: do not use a heat gun, because the enormous heat will cause a stress-cracking damage to paintwork or glass. In warm weather conditions is usually no hair dryer required, the film is sufficient viscoplastic when warm. In winter, the film tears faster or goes off only in many small pieces. |
 | Smooth off the film |